Saturday, December 10, 2011

Character Development

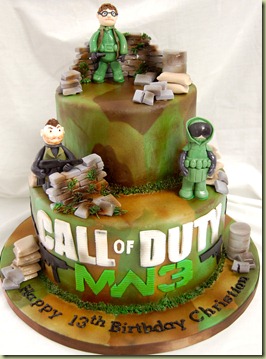
When a customer asks for a “themed” cake like the “Call of Duty” cake I did this week, I usually offer them a few different ways we can interpret the theme. For example, I asked Jennifer if her son would prefer a small tiered-cake with figures and a setting made to look like a scene from the game, or if he’d prefer a 3-d cake in the shape of an element from the game, such as a tank or a helmet. Christian liked the idea of the cake with the figures and asked me to include three things specifically; the logo, Captain Mactavish and the Juggernaut Bomb Suit. When I told Jennifer I could include a figure of her son in the scene to personalize the cake even more, she loved the idea.

The figures I make tend to look more cartoon-y than realistic, so the trick was to not make the cake cute. I looked at loads of photos from the game and “cute” was definitely not what came to mind. A lot of the game seemed to take place in bombed-out cities, so that’s why I used the broken down walls, sandbags and oil drums for the background.

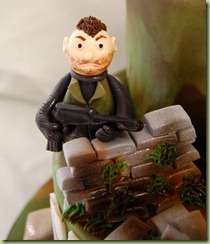
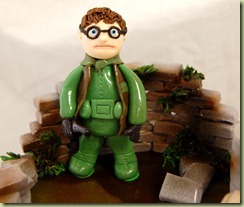
The first character he wanted to include was Captain Mactavish. Here’s the photo he sent and my version made out of fondant:

captmactavish callofduty5

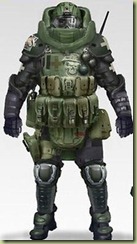
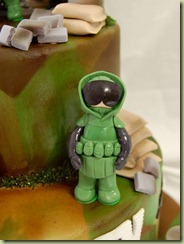
He also wanted to include the Juggernaut bomb suit:

juggernaut-bomb-suit-MW3 callofduty4

Jennifer sent me a photo of her son. Here’s the fondant version of Christian ready for battle:

callofduty3

Happy Birthday, Christian!!

callofduty1

Monday, November 28, 2011

Cake Design 101

There are a number of different ways I approach cake design.

Sometimes the customer comes in with a photo and asks me to re-create that cake exactly. Of course, I would much rather create a unique design for each of my customers since that’s more creatively satisfying, so I will encourage them to tweak the design to reflect their own style. But, if they really want the design exactly as it is in the photo, I won’t refuse to replicate it as long as it comes from a public source, e.g, a bridal magazine or bridal planning website. I’ve made cakes for magazines and understand that when a photo of my cake is published as a design inspiration the cake may be replicated by another baker, and I’m OK with that.

You might think that it’s liberating when a customer says “Do whatever you want”. But it can be quite difficult if they give me no direction. So I'll have them to look through my photos and point out some cakes that they like and ask what specifically attracts them to each. Through this process I often see a pattern of their likes/dislikes and can start from there to create a design for them.

Ideally, a customer comes in with a sense of what they want, but not an exact photo to work from. I’ll use one of my favorite recent cakes to illustrate how the bride and I worked together to create her cake.

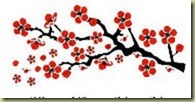
When Shan came in for our initial consultation she brought along her wedding invitation, which featured a cherry blossom motif:hu-invite

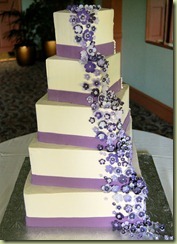
There are lots of cherry blossom cakes out there, so the challenge was to come up with a design that was unique for this bride. In looking at my portfolio she zeroed in on two cakes:

cherryblossom1 carson

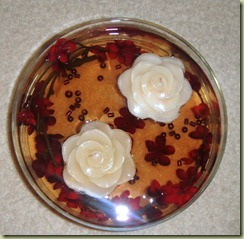
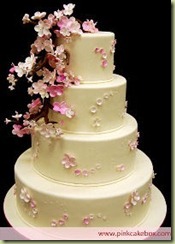
As a follow up to our meeting she sent me photos of her centerpiece, a cake she saw on the web (from Pink Cake Box) and the type of topper she planned to use.

hu-centerpiece hu-pcbCute Hugging Bride and...

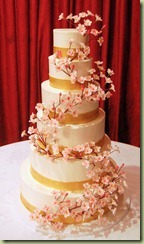
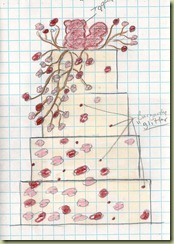
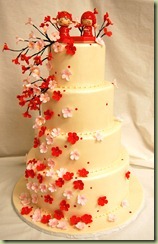
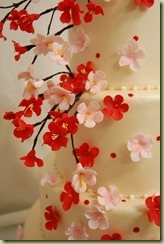
So I pulled together elements from all these sources. The fondant would be ivory, since I love the red/ivory combination. I used both red and pink cherry blossoms, as she’d asked me to do, but kept the number of branches to a minimum to work within her budget. I made the branches in the same style as those on the cherry blossom cake from my portfolio, but had the branch reaching downward, as it was in the photo from Pink Cake Box. I then scattered the loose blossoms similarly to the purple blossoms from my portfolio cake. I added the bits of red glitter to the design because I liked the way they looked in her centerpiece.

Here’s the rough sketch and the final cake:

hufinal hu hu-blossom closeup

The topper featured two solar-powered bobble heads. How cute it that?

Sunday, November 6, 2011

From My Kitchen–Fall Goodies

Though this blog is mainly a place to talk about and showcase cakes produced for Cake Art Studio, I thought it might be fun to occasionally show some of the goodies that come out of my home kitchen.

I’ve been a baker for as long as I can remember, literally. One of my earliest and fondest memories is playing with my easy bake oven--staring into the little window, waiting an eternity for those tiny cakes to be baked by a 100 watt light bulb.

Since my family is a little tired of cake (yes, it’s possible) I almost never make cakes for us. We have birthday pie or tart instead of birthday cake.

A few weeks ago my daughter was home from college for fall break. I always try to make some of her favorite goodies when she’s home. I figure if I always have their favorite foods, they’ll always want to come home (hopefully). Fall break called for some fall favorites.

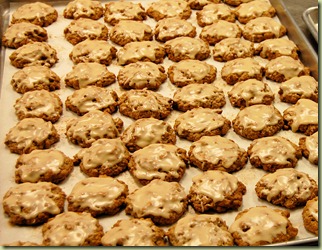
I made a huge batch of oatmeal-maple cookies, thinking that she could take the left-overs back to school with her…there were no left-overs:

oatmeal-maple cookies

I will now give you my secret recipe: Buy one box of Quaker Old-Fashioned Oats, open the box and look under the lid. That’s where you’ll find the recipe I use, mostly. I do tweak it just a bit, but the recipe on the box is great. The glaze is what makes these cookies so good. It’s made with confectioners sugar and maple syrup. Just stir enough maple syrup (and, yes, it has to be real maple syrup!!) into 1# of sugar until it’s the consistency of pancake batter. I put the glaze on while the cookies are still warm so it dries into a nice shiny crust. Sooo yummy!!


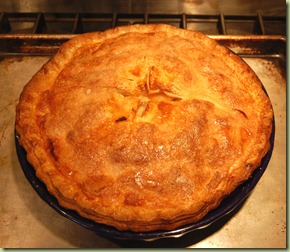
Pie of any type is a favorite in our house and apple pie is a staple for fall:

apple pie A piece of this actually did make it back to school with my daughter. You don’t need a “recipe” to make a good pie crust. I use a 2:1, flour to fat, ratio. So, basically, 1# of flour and 8oz of fat with a little salt, and maybe sugar, and some ice water, is all you need. Of course you can play around with the type of flour and fat. Next time I make pie dough I’ll take pictures and walk through the steps to a great crust. Pie crust is a topic that deserves its own post. And the apples? Well, next week I’m picking up 30# of “Gold Rush” apples I special ordered from North Star Orchards. Gold Rush apples make, by far, the best apple pie ever!


Happy Fall!!!

Monday, September 26, 2011

Everything’s Coming Up Roses

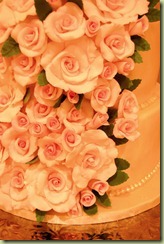
Lisa wanted a cascade of pink roses on her wedding cake. For a 5 tier, 200 portion cake I would need A LOT of flowers-10 dozen to be exact. Lisa wanted a cascade, not a trickle.

I always make more flowers than I think I’ll need to allow for some breakage and just to be sure I have plenty of flowers to complete the look. I like to use roses at every stage of bloom, from just opening buds to fully blossomed flowers.

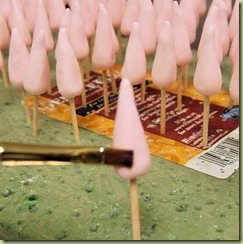
What does it take to produce a look like this? Well, first of all, lots of time. It took a total of about 18 hours over several weeks to complete all the flowers and leaves. To make 120 roses I had to cut and shape about 1000 individual rose petals and several hundred leaves. Each petal and leaf was then shaded to give it some depth. Here’s a step-by-step illustration of the process:pinkroses1
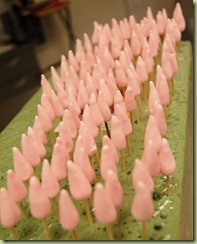
First I make a cone base for each flower. I like to use a toothpick, rather than wire, to hold the cone because toothpicks are food-safe and can be stuck directly into the cake. Once all the cones are made they must dry completely before I begin adding the petals. I set them aside for a day before going on to the next step.
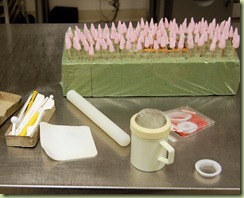

pinkroses2

Once the cones are dry I gather my supplies and set up an assembly line.
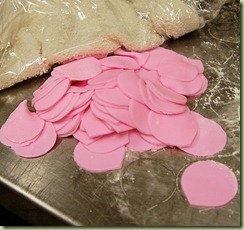
pinkroses3


The first step is to cut 120 petals to wrap the center cones. The petals here are much brighter pink than I want for the final roses for two reasons; 1-I like to make the center of the flower a deeper color than the outer petals and 2-pink always fades when it dries so I make the pink a shade or two darker than I want it to be in the end.

While I’m working with the petals I cover them with plastic wrap and a damp towel to keep them from drying out.

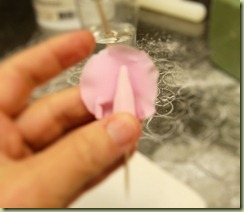
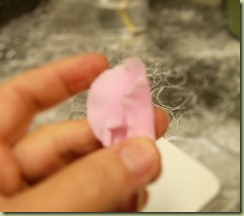
Each petal is frilled to give it a more natural shape, then it’s attached to the cone with a little water.
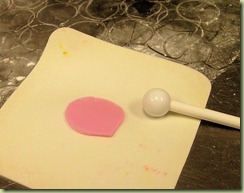
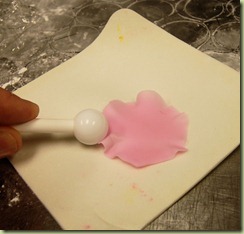
pinkroses4pinkroses5pinkroses6pinkroses7pinkroses8

Only 118 more to go….pinkroses10 Once again they are set aside to dry before the next step.
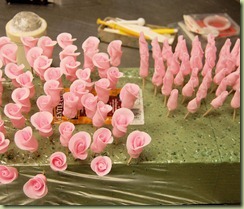
pinkroses11

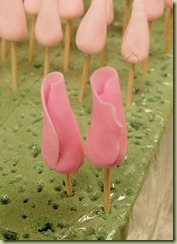
I decided to leave about 30 roses at the “bud” stage. The “buds” have one center petal and one more layer of two petals

The next stage is to add a layer of three petals for a partially opened rose. For fully opened roses I add another layer with 5 petals. I made one very large rose by adding a final layer of 7 petals. The largest rose would sit on the top of the cake.

Once all the roses are dry they’re ready for a touch of color. pinkroses12
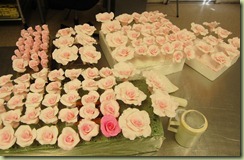
I use a bit of pink petal dust in the center of the rose and along the edges of the petals. It’s an extra step that gives a little more life to the flowers.
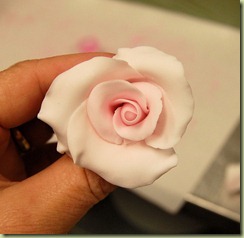
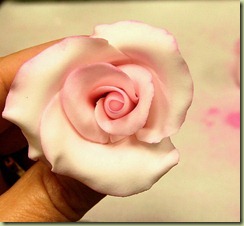
pinkroses13pinkroses14

Of course the final step is to arrange the flowers on the cake. This has to be done on-site--hence the less-than-ideal lighting in the photos. It’s definitely gratifying when the florist tells me that it looks like I plucked the flowers out of the centerpieces and put them on the cake!!
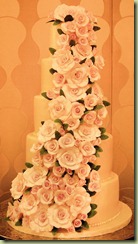
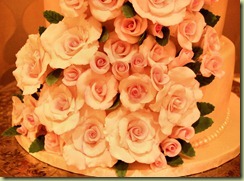
cohen3 cohenrosescohenroses2

Friday, August 19, 2011

Brides Magazine

In early January I received an email from Brides magazine inviting me to participate in their search for “America’s Most Beautiful Cakes”. I’d done cakes for Philadelphia magazines before, now I was very excited about possibly of having a cake in a national magazine. I immediately responded that I’d love to participate…and immediately starting worrying about the design.

They said that they were “looking for inspirational designs that have never been published with techniques that are beautifully executed”. I had to submit sketches within a couple of weeks. Personally, I tend to fine-tune the details of a cake design while actually doing the decorating. My sketches are often more a general idea of what I want. But, I knew I had to have a very solid sketch.

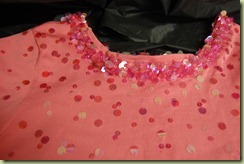
I started mulling over ideas. I’m willing to bet that most cake designers are like me, seeing ideas for cake designs in the most unlikely places. I have this pink sweater that my sister once commented looks like “pink champagne”.bridessample3 028

I’ve always thought it would make a beautiful cake design. So I started playing with design techniques. I decorated several dummy cakes, and then photographed the decorated dummies to see how the “glitter” would look in a photo, since what looks good in person doesn’t always show as well in a photograph. I really wanted to get my design nailed down before sending the sketch off for consideration.

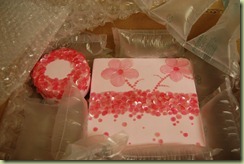
Three agonizing weeks later I was notified that I was a semi-finalist. Semi-finalists were to send a sugar-tile showing the colors and design techniques.

20110311_95

I really liked the design in pink, but figured they might get lots of pink cakes. I sent a pink sample, but noted that I thought the design would also look pretty in a “champagne” color.


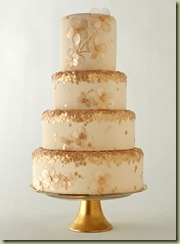
20110401_15So, another two weeks passed before I was informed that my design was chosen as a finalist. Now I had to send a fully decorated dummy cake to NYC to be photographed, but first they wanted to see a sample in “champagne”. They ultimately chose “champagne”.

20110511_19


I decided I would drive to NYC with the cake, rather then packing it up and shipping it…and I’m so glad I did. Not only was it fun to see behind-the-scenes of the photo shoot, but I was not in the studio two minutes and who walks in the door but Elisa Strauss and Marina Sousa. Then Kim Payne and Jennifer Jones arrived with their cakes and, just as I was leaving (because I was parked in a construction zone) in walks Kerri Vincent. If you are a cake decorator, or watch the cake challenges on Food Network, you know that these women are some of the best cake decorators in the country…and little ole me and my cake there with them.

brides-magazine-wedding-cakeI delivered the cake in early May and had to wait a very long month before finding out it was going to be in the September issue. Finally, 9 months later, there it is in the magazine.

Tuesday, May 31, 2011

Cake Story

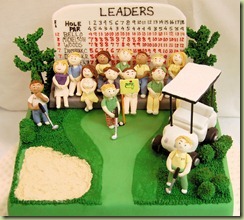
Last week wasn’t super busy as far as the number of cakes, but I did have to make lots of little figures and details for the cakes, especially for Nick’s groom’s cake. Liza wanted to surprise Nick with a golf-themed groom’s cake at their wedding. Most groom’s cakes are a replica of an item that represents one of the groom’s interests, such as a jersey from a favorite sports team or a game system. But Liza wanted this cake to tell a story-Nick winning a Masters tournament.

golfscene

Liza wanted a Leader board that showed Nick in first place, beating Tiger Woods, Phil Mickelson and a few of Nick’s family and friends.

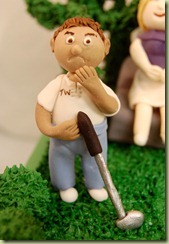
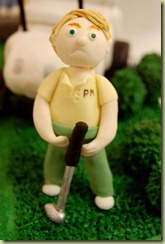
She wanted to include lots of little details; the Masters flag, golf cart, sand trap, the spectators in the stands and even Nick’s blond hair and plaid pants. When I came in for dinner on Saturday night I told my husband, “I sometimes have a very strange job. I just finished painting pink and green plaid onto tiny sugar pants on a tiny sugar golfer.”

Here’s Nick in his polo shirt and plaid pants:golfer

tigerwoodsTiger Woods is not too happy that he lost to Nick…

and Phil Mickelson is pretty angry: philmickelson

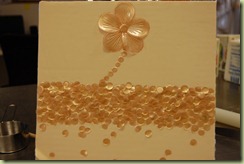
Congratulations Nick & Liza!!
Monday, May 16, 2011

Just Peachy

When Peter arrived alone for his wedding cake consultation I was a little surprised. Usually the bride and groom come in together, often with a few parents and/or bride’s maids along for the ride. After all, it’s free cake!
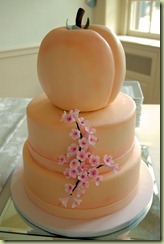
This was a second marriage for Peter & Angie so they were pretty low-key about the details. Peter wanted to surprise Angie with a cake that celebrated her Georgia roots. He came in with the idea to have a cake shaped like a peach. I suggested that we use the peach as the top of a tiered cake so it would still look wedding-cakeish. The plan was to have the tiers covered with peach-tinted fondant with air brushing to match the blush of the peach. We left the final details open to interpretation as the cake was being decorated (my favorite way to work).

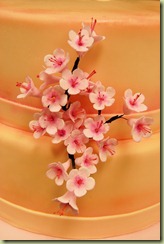
peachblossoms

I decided to make some peach blossom branches for the lower tiers. I thought this would tie the lower tiers in with the peach theme, and add a lovely and traditional detail to the cake.

I was worried after I put the peach fondant on the tiers. It seemed a bit garish and just too much of one color, but the airbrushing came out pretty and toned down the overall effect. I think the blossoms added just the right touch by breaking up all the peach color and highlighting the pink blush.

simmonsI was quite happy with final product but was still a little nervous because it was definitely not your typical wedding cake. I was so pleased when I got to the Hilltop House in Devon for the delivery. The room was beautifully outfitted with crisp white and peach linens, and the color of the cake fit perfectly in the décor.

Surprisingly, the cake inside was vanilla with vanilla buttercream. You might expect a peach filling, but Peter wanted to keep the flavor simple.